Reviewing AI Classifications
After processing, you review what the AI extracted. Archivers.ai is explicit that you're in charge — the model proposes, you dispose.
Where to find it
From the accession page, the Items tab is the review surface.
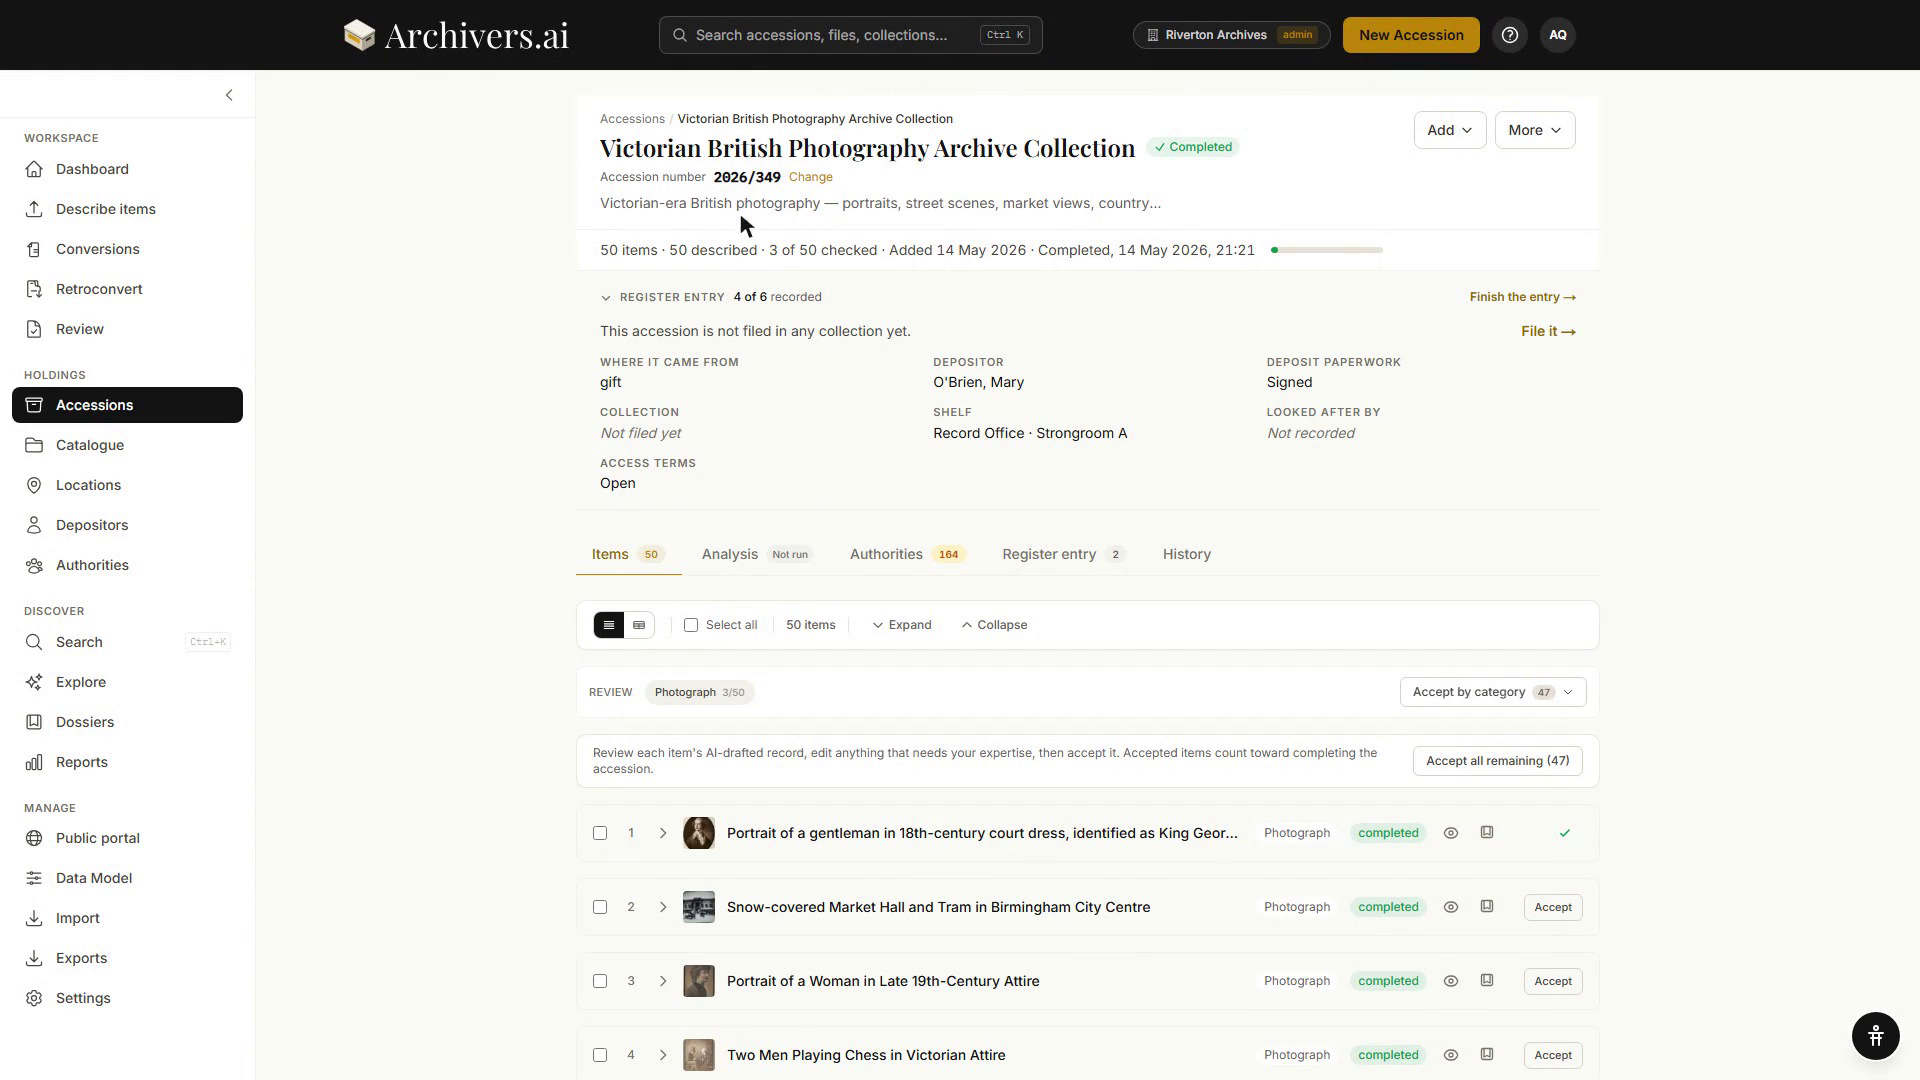
The toolbar
| Control | What it does |
|---|---|
| Row view / Table view toggle | Cards vs. spreadsheet-style columns |
| Select all | Tick every visible row |
| Expand all / Collapse all | Open / close every row at once |
| Accept by category | Bulk-approve every item of a given category |
The Accept by category strip shows progress per category as a chip and a fraction (e.g. Artefact 0/1, Audio 0/2, Video 0/1) — that's how many in each category you've accepted.
What you're reviewing per item
When you expand a row, you see every field in that item's metadata schema. The schema comes from Settings → Data Model — different categories have different fields.
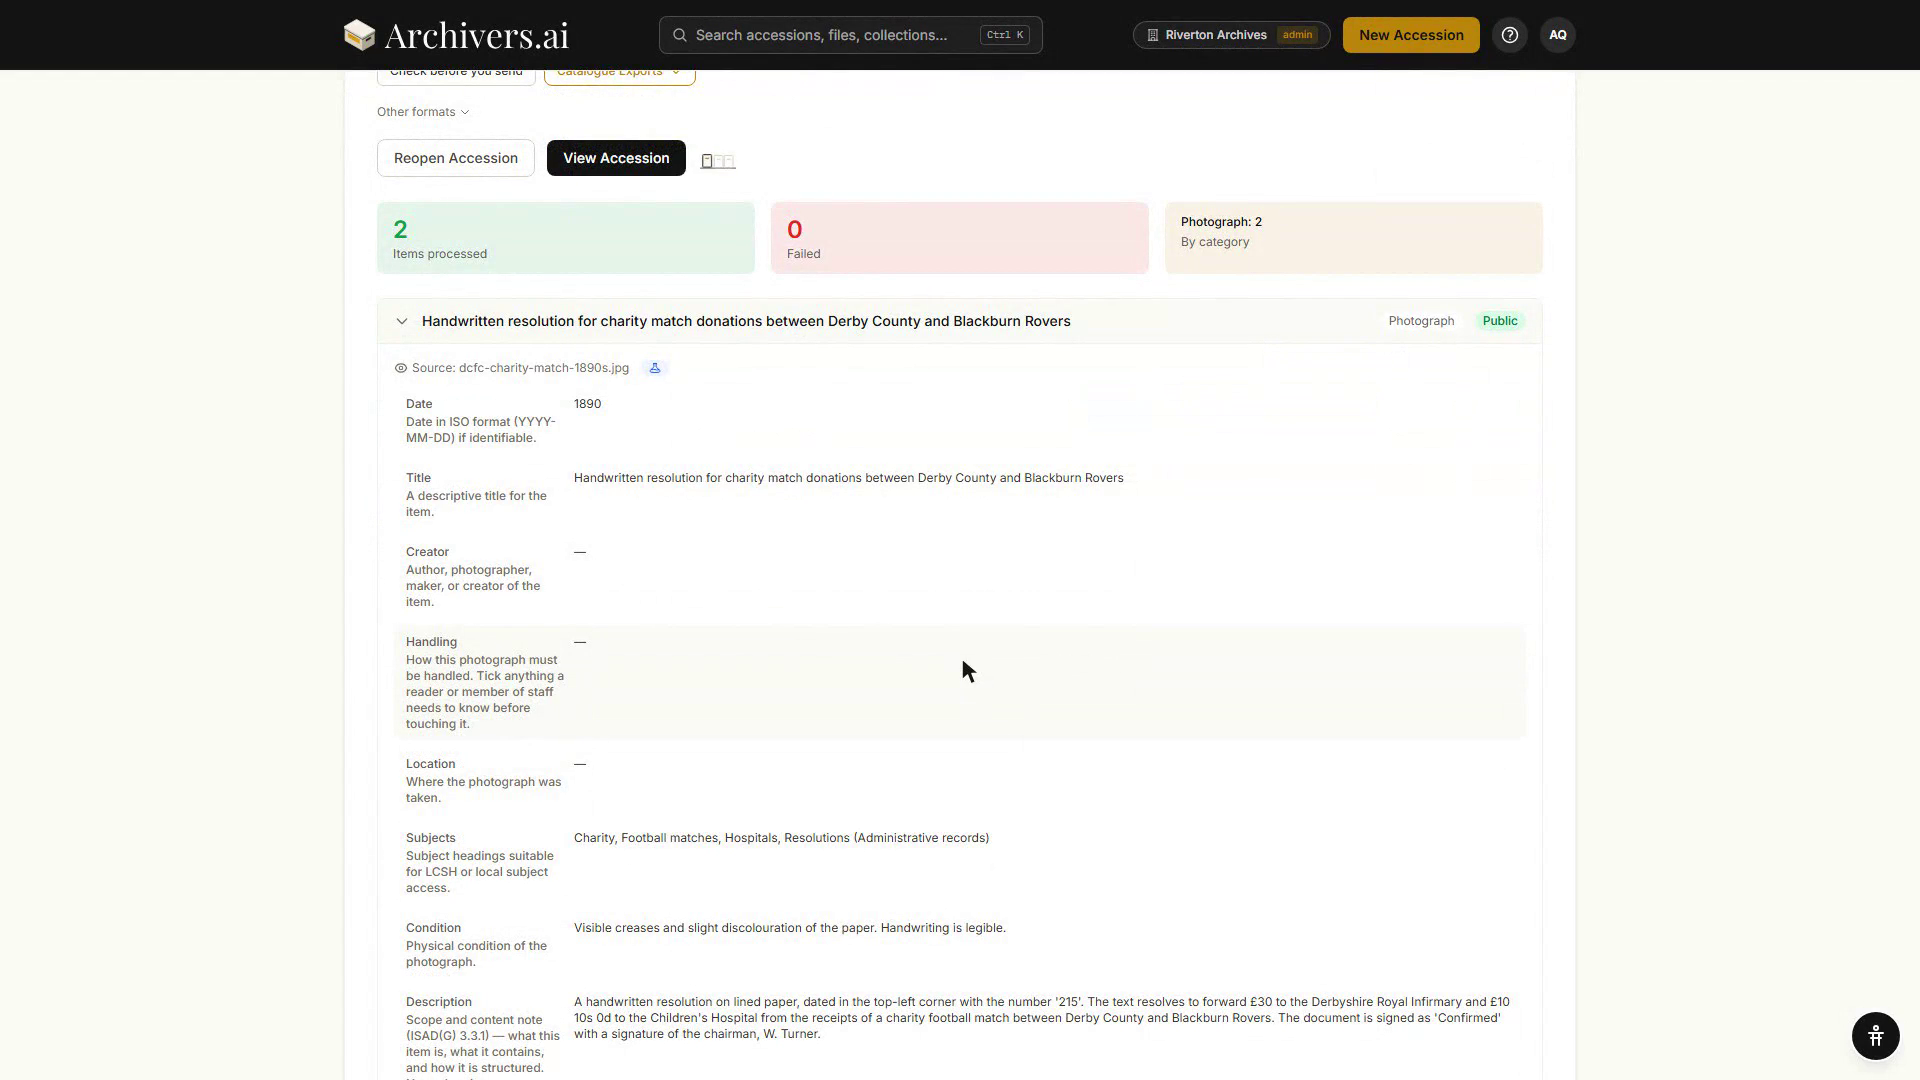
For an artefact, that's typically:
- date — date or date range
- title — short descriptor
- condition — narrative conservation statement
- materials — controlled list (resin, paint, paper, etc.)
- dimensions — measurements
- description — full description
- object type — controlled vocab (figurine, badge, programme, …)
- inscriptions — any text on the object
- pii detected — whether the item contains personal data
- access rights — Public / Restricted / Closed
- creator maker — creator or maker of the object
- date certainty — how confident the model is in the date
- content warnings — sensitive-content flags
- provenance notes — how the object came to the repository
Documents, photographs, audio, and video have their own schemas — see Settings → Data Model for what's active in your organisation, and Data Model to customise.
Editing fields
Click any value to edit it inline. Pills (authority-linked fields like subjects, people mentioned) open a small picker:
- Type to add a value — the picker offers matches from the bound vocabulary (LCSH, FAST, Getty AAT, TGN, etc.)
- Click an existing pill to remove or swap the linked authority
The AI's first proposal is editable; you're never locked in.
Accepting items
Once a row is reviewed, click Accept at the end of that row. The row's status flips to accepted and counts toward the per-category progress.
Accept by category lets you bulk-approve everything in one category in a single click — useful when the AI did well on, say, all the photographs but you want to look at each video individually.
Flagging for later
If you're not sure and you want to come back, leave the row unaccepted. Anything left unaccepted shows on the Review desk under Catalogues to check, and flagging a record from the check screen puts it under Marked for attention — see Reviewing records.
Linking files as pages
When you upload multiple files from the same original document (e.g. a multi-page letter scanned as separate image files, or a bulletin uploaded as 9 individual pages), you can link them together so they process as one catalogue item with multiple pages — instead of 9 separate items.
Auto-detection and nudge
When you upload sequentially-numbered files (e.g. bulletin_1.jpg, bulletin_2.jpg, … bulletin_9.jpg), the wizard's Review Classifications step shows a banner — These 9 files look like pages of 1 item — link them? Click Link all to combine them with automatic page numbering, Link on an individual group to be selective, Undo to reverse it, or Dismiss to keep them separate.
Manual linking
To manually link files:
- On the Review Classifications step, tick the files you want linked — the first in filename order becomes the parent.
- In the selection bar, click Link n. All the files must share one category.
- The page numbers are assigned automatically: the parent is Page 1, the linked files become Page 2, Page 3, etc.
Reordering pages
For document-type parents, you can reorder their linked pages:
- Expand the parent file on the Review Classifications step.
- Each linked page shows ↑ and ↓ buttons.
- Click the buttons to move a page up or down in the sequence.
- Page numbers update automatically as you reorder.
Unlinking
Click Unlink on a linked page to separate it back into its own item, or Unlink all in the selection bar to remove every parent/child link in the accession.
File names and sorting
The review grid sorts files by natural filename order (so page_2.jpg appears before page_10.jpg), not upload order. This makes it easier to spot sequential uploads that should be linked.
After review
Accepting every item doesn't complete the accession — completing is a deliberate act. Once processing has finished, the accession's primary button reads Complete this accession; you can also complete a large accession on auto-accept, with a reason. Either way you can:
- Run Collection Analysis (Analysis tab) for a top-down summary of the batch (Professional and Institution plans)
- Review linked authorities (Authorities tab) — verify the extracted subjects, people, and places resolved correctly (Starter and above)
- Export via the Export panel at the bottom of the accession page
About AI classification
Automatic category assignment and metadata extraction are part of the standard processing pipeline on every plan, Community included — the AI drafts, you check. What Community doesn't get is the rest of the pipeline: no OCR or transcription, no controlled vocabularies or auto-linking, and no collection analysis. Those come in from Starter (OCR, transcription, vocabularies) and Professional (the analysis suite).
Tips
- Trust the model on routine fields, scrutinise the headline ones. Title, description, and access rights deserve a careful read. Date certainty and PII flags are usually right.
- Subjects in particular are worth checking. A wrong subject heading propagates into your finding aid and into Search.
- Don't accept then change your mind. You can re-open and edit accepted items at any time — Accept is a workflow signal, not a lock.
See also: Reviewing AI-drafted records for the workspace-wide Review desk and its check screen.